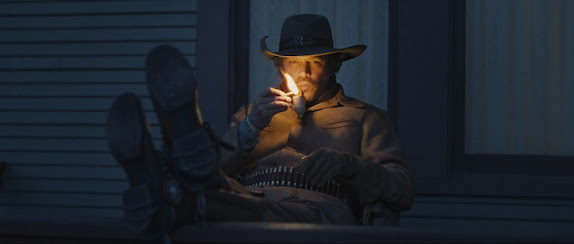
Three point lighting is made up of three components: Key Light, Fill Light and Hair Light.
Key Light:
This is the brightest light that is used. It casts the most light onto the subject. This light could be used on its own and would create shadows and an element of darkness around the subject creating a 'dramatic' effect/ look.
Fill Light:
This is a light that is often placed further away from the subject or would be 'more dim' than the key light and eliminates the shadows that are caused by only having a key light on. It softens the lighting onto the subject and creates an even light across the entire subject. It is softer than the key light and in turn compliments it well.
Hair Light:
This light goes above the subject and slightly behind them. It is then angled in a way that will cast light onto their head and brighten up the subject. When this is added with the other two points of lighting it creates an even light across the subject and the hair light adds an additional layer that makes the subject stand out. It is important to make sure that the light isn't being directed into the camera as it will create a lens flair which could ruin your shot.
Additionally to three point lighting you can use lights to brighten up the background as well meaning the subject and the background will all be well lit.
Set Up:
Key Light:
Fill Light:
Hair Light:
Chiaroscuro Lighting:
Chiaroscuro is the blend between light and dark elements in a scene also known as high contrast lighting (having light and dark elements contrasting each other). This effect is used very commonly in horror films to make the audience feel uneasy.
Soft boxes:
Soft boxes are used in lighting to 'soften' the light on the subject. They are a fabric box that attaches to the light. The light still passes through however it isn't as 'harsh' and casts a smoother light over the subject. Soft boxes are often used a fill lights to help create smooth and even lighting across the subject when mixed with a key and hair light. They can be used as key lights as well however that is less common. This is because the key light is usually the brightest and 'harshest' light source in a three-point lighting setup.
- The higher the shutter speed to faster the shutters will open and close.
- The lower the shutter speed the slower the shutters will open and close.
- Higher shutter speeds allow for faster movements to be captured more clearly e.g. a stream of water will be captured clearer with a higher shutter speed.
Aperture:
- This controls how much light is let in the lens.
- The lower the aperture f-stop the more light that will be let in.
- Having a lower f-stop means more light will be let into the lens. In turn you will need a higher shutter speed as to not over expose the image and make it too bright. The high shutter speed with make the shutters open and close quickly letting less light in.
- Lower f-stops also creates a shallower depth of field (the foreground in focus with the background out of focus).
- Higher f-stops create a deeper depth of field (the foreground and background both in focus).
ISO:
- The cameras sensitivity to light.
- While having a higher ISO adds more light to an image, every increment of ISO you use worsens the image. It will add more grain to the picture and create 'noise' on the image.
Different cameras and lenses will affect each of the settings differently. Some lenses can let in more light and reach lower f-stops. Some lenses can have faster and slower shutter speeds. Certain cameras can be more sensitive to light and reach higher ISO's without creating grainy/ noisy images.
White Balance:
- White balance is you camera compensating for different lighting situations. If you are filming inside and your scene is looking very orange you can use white balance to add more cool light to reduce the orange tones.
- You can select different setting based on your environment. For example, if you are shooting in a cloudy overcast environment you can use the cloudy setting in the white balance to counter this and add warmth to the image. If you are filming indoors with warm lighting you can use the tungsten light setting to add more cool tones to the image.
- You can also use the Kelvin setting to customise the cool and warm notes.
RAW and JPEG Shooting:
RAW footage is an uncompressed file that is much better quality than JPEGS. A JPEG file is compressed and therefore loses quality when it is being edited. RAW files do however take up more storage but in turn you get a significantly better product.
Camera Lenses:
The standard camera lens that comes with a canon camera is an 18-55mm. This means it can zoom out to 18 mm and zoom into 55mm. It also has an F-stop of 3.5 (the lower the f-stop means to more light it can let in and the shallower the depth of field).
Other lenses that are commonly used are:
16-35mm: This is a wide angle lens. It allows the user to get a wide view and can be used for landscapes and photos that need to capture a lot of subjects.
50mm: This lens can't be zoomed as it is at a fixed mm. They usually however have a very low aperture, on the Canon 50mm STM lens it can go as low as 1.8f meaning it can shoot in low light extremely well and will get good depth of field. Buy Canon EF 50mm f/1.8 STM Lens — Canon UK Store
75-300mm: This lens will allow you to zoom into 300mm meaning you can get extreme close ups of objects. You will most likely need a tripod however as the further you zoom in the more shaky the footage/ photo will be.
I will show this information in a video form. I will use studio 2 to set up a camera over the black background. I will use graphics to annotate the different parts of the camera and explain what they will do. I could then give a visual representation of the difference using different settings makes. For example a before shot with the settings the wrong settings and then an after shot with the correct settings showing the difference between the two.